
|
|
New games every week!
Petit Switch - Session One
Blog
22nd May 2019
SmileBASIC Games : Complete Game List
Quick Start Tutorials : Getting Started, Scrolling Backgrounds A, Flames OneScreen Tutorials : Banana Dodging, Tennis Useful Forums : SoCoder, SmileBASIC Source Today marks the initial Japanese release of Petit Computer for Switch (PetC4) and .. well, I'm a coding addict, so you know I HAVE to at least get SpikeDislike up and running. There's a few stumbling blocks.. well, one, really, and that is that I don't know any Japanese whatsoever. If you'd like to download my various PetitSwitch games, head to this page for the codes -=-=- I'm going to be relying heavily on Google Translate's "camera" functionality, which lets you translate text in real-time. It isn't perfect, but I'm hoping that I can use it to navigate my way through most of the menus that the interface is going to have. Between that and my own decades worth of coding, as well as my previous experience with both the DSi and 3DS versions of SmileBASIC, I'm fairly confident that I should be able to get the basics of the game up and running. At the end of the day, the code will still be just that. Traditional BASIC, which thankfully tends to be in English'ish. Commands, variables and symbols are pretty much a constant in the world of code. .. usually! There may be a few pratfalls, and I'm hoping that if there are, I can manage to avoid them. But other than that, I'm going to be going into this blind, and .. honestly, I've no idea how well it'll go. Although I'll try to remember to take screenshots and the like, and try to help fellow coders understand what they're doing with Petit Switch, please don't consider this to be a tutorial. If you're going to attempt to use Petit Switch without understanding coding basics, this won't help you. This is more a guide to the software, than a tutorial of how to code. Preparations/SetupBefore buying Petit Switch, I ensured I had everything necessary. A USB keyboard and mouse, along with a USB-C hub to hook them up to an undocked Switch, were all purchased. 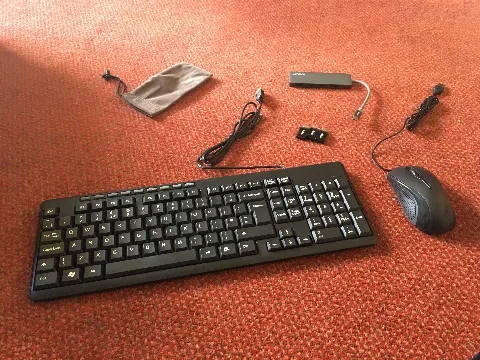 Exact items purchased and Amazon links are available in this post. The USB-C hub might not be any useful to you, but I typically tend to sit in bed at night, coding, and the Switch hub is downstairs connected to the telly!! So.. um.. yeah! The USB hub works great for hooking up the keyboard and mouse to the Switch, without the thing having to be docked. Next, I added a new Nintendo Account to my Switch. Using the Nintendo website, I registered anew with a secondary gmail account, ensuring the Nintendo Account was set to Japanese. Then I added that account in the Switch, and from now on if I open the eShop, I can select between my English Account, or my Japanese one, to navigate to the two different eShops. After that, I needed some cash in my Japanese Account. Heading to Play-Asia.com, I bought a 5000 Yen card for £40. (Petit Switch costs 3000 yen, which works out at around £25.) Play-Asia sent over the eCode via email, and I typed that into the Japanese eShop Account on the Switch. This was a LOT easier than I expected it to be!! Bravo, Nintendo! After that, a simple purchase of Petit Computer, and then waiting for the download... Important NoticeOnce you come to boot up Petit Switch, be sure to use your Japanese account. Uploading a finished project requires "Upload Slots". These can be purchased, but you should get (IIRC) 10 slots free with the purchase of the program. Only the account that purchased the program will get those 10 free slots, and other accounts will need to purchase additional slots. But since the app hasn't been released outside of Japan, only a Japanese account has the ability to buy those slots. Also, you can't (I don't think!) transfer projects between accounts. If you start using your "normal" account, anything you create will be stuck there! Use your Japanese account! Learning to NavigateThe first thing I did was try to figure out the interface. The top menu has a set of 9 buttons that you can (I'm guessing) set to your favourite projects, then on the right are six main menu buttons. 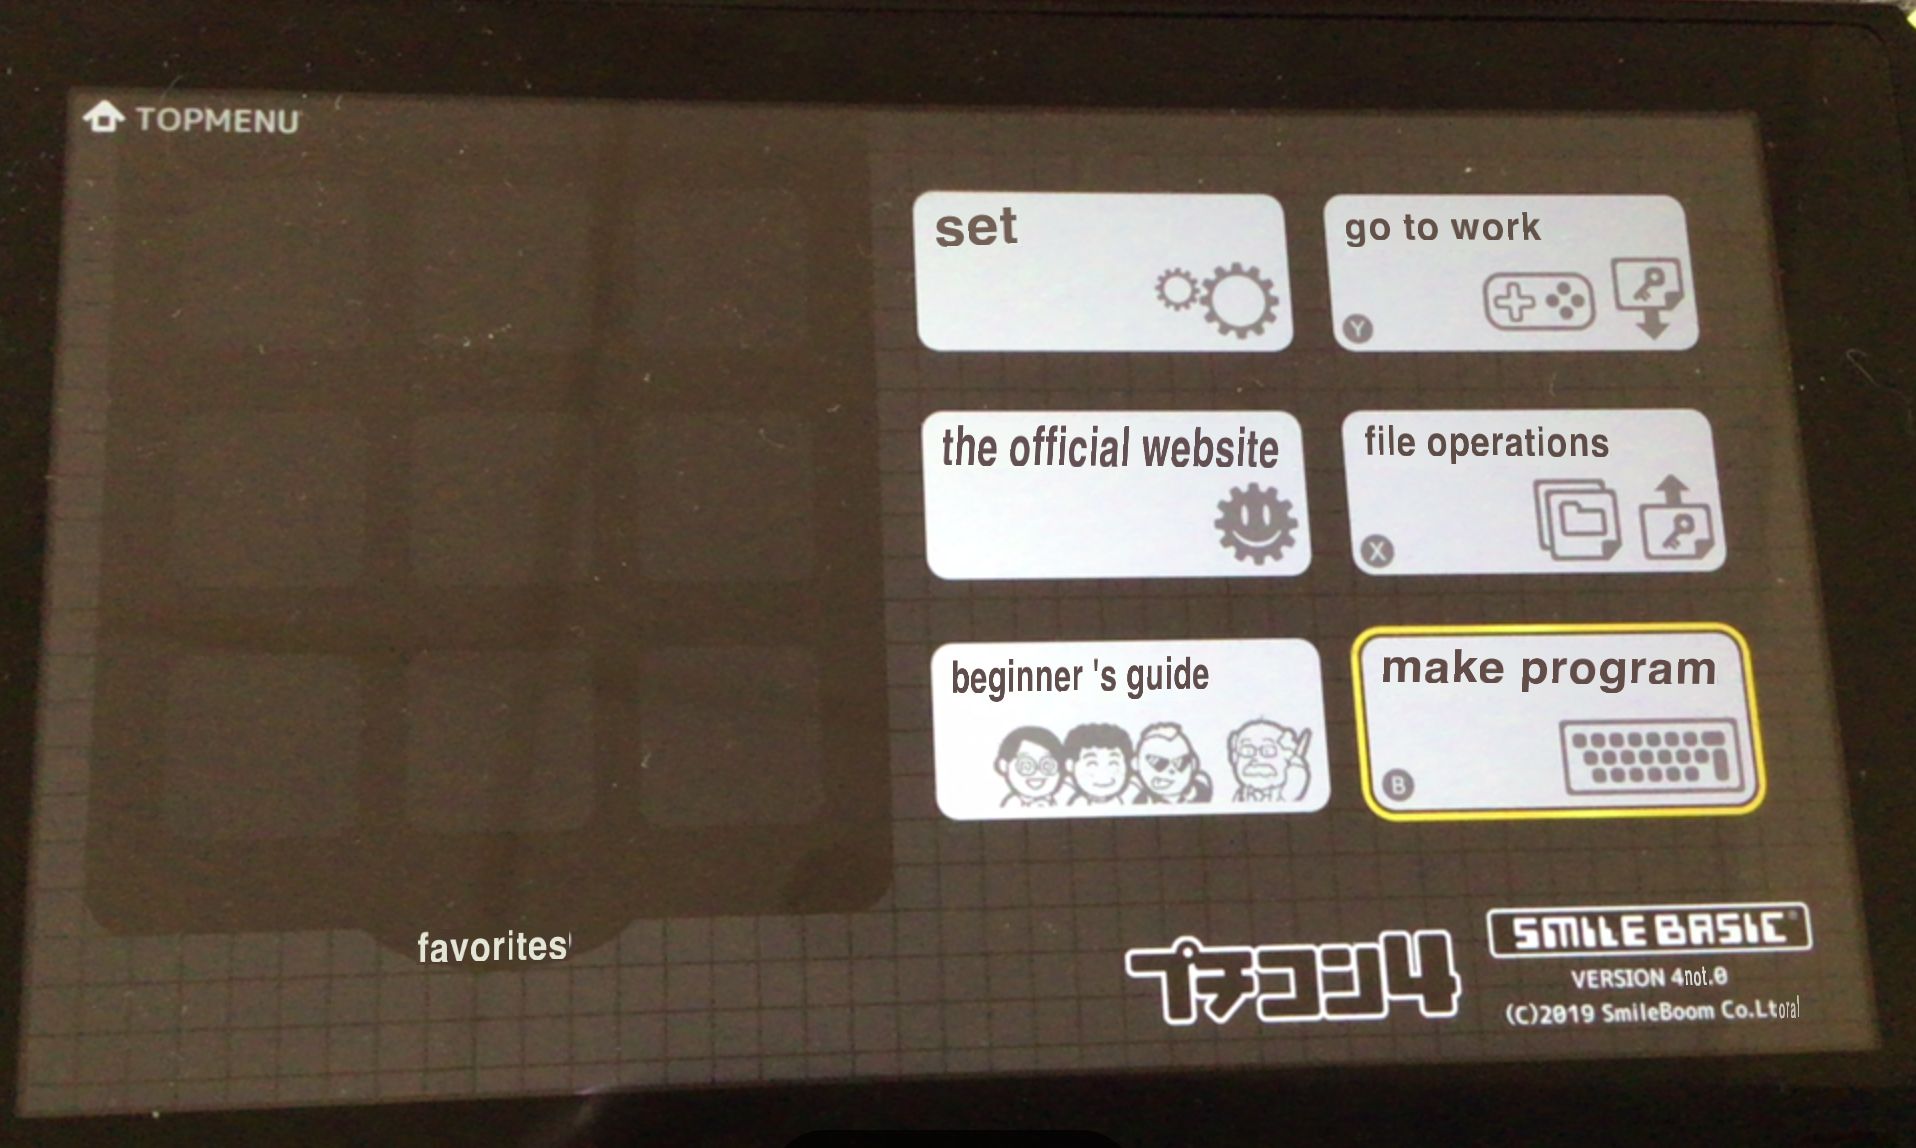 The middle right button is File Management, if you go in here, you get to the "New Project" button. 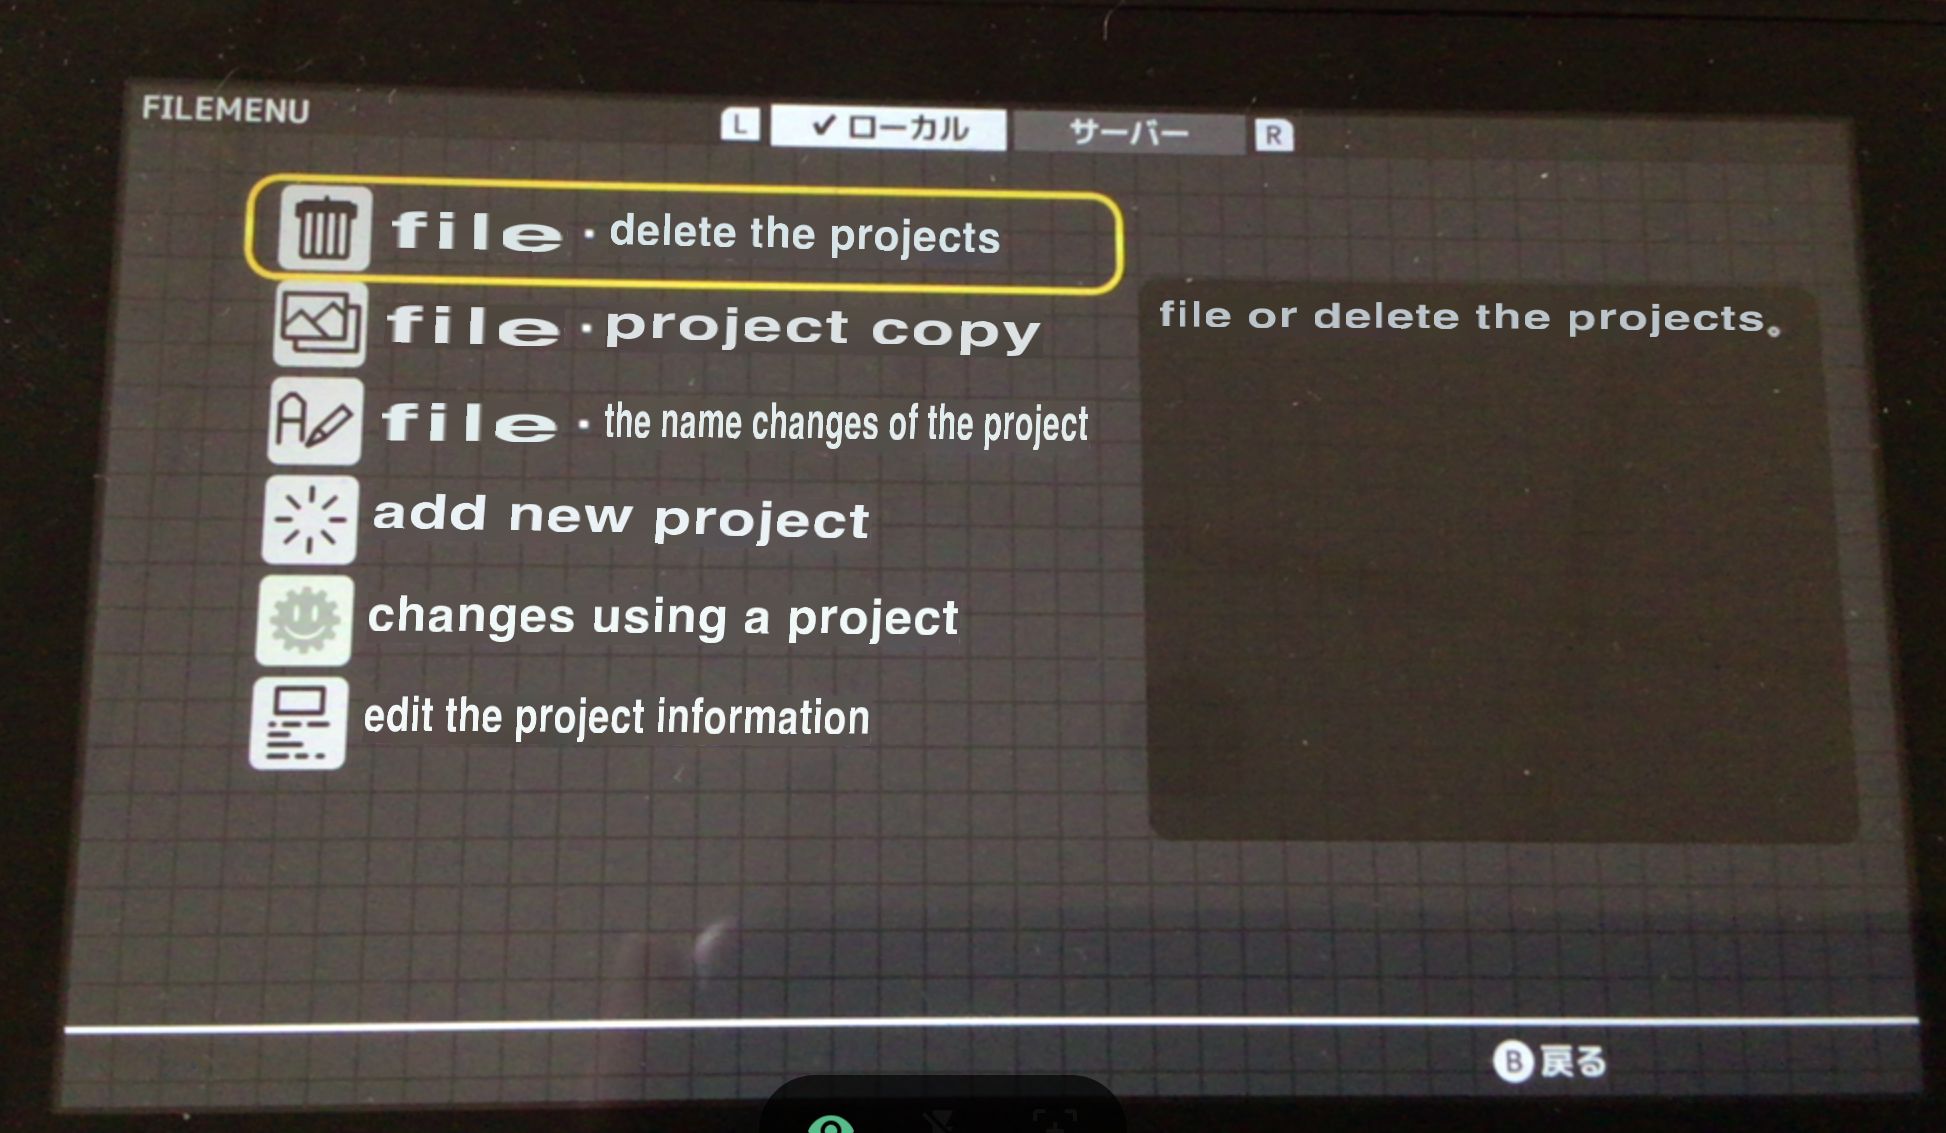 Hit that, then "edit the project information" to give the project an icon. You can also edit the Title and Memo (description?) on the top right. At any time, hit the Switch's (-) button to bring up an onscreen keyboard, or.. .. plug in a USB, instead! Don't forget to save, then head back to the main menu. Next, head to the upper right. I'm not 100% sure that this is how things work, but click on your new project, and hit A. I *think* that selects it as the current project. It'll try, and fail, to load anything at this point, since there's no Main.prg to load. 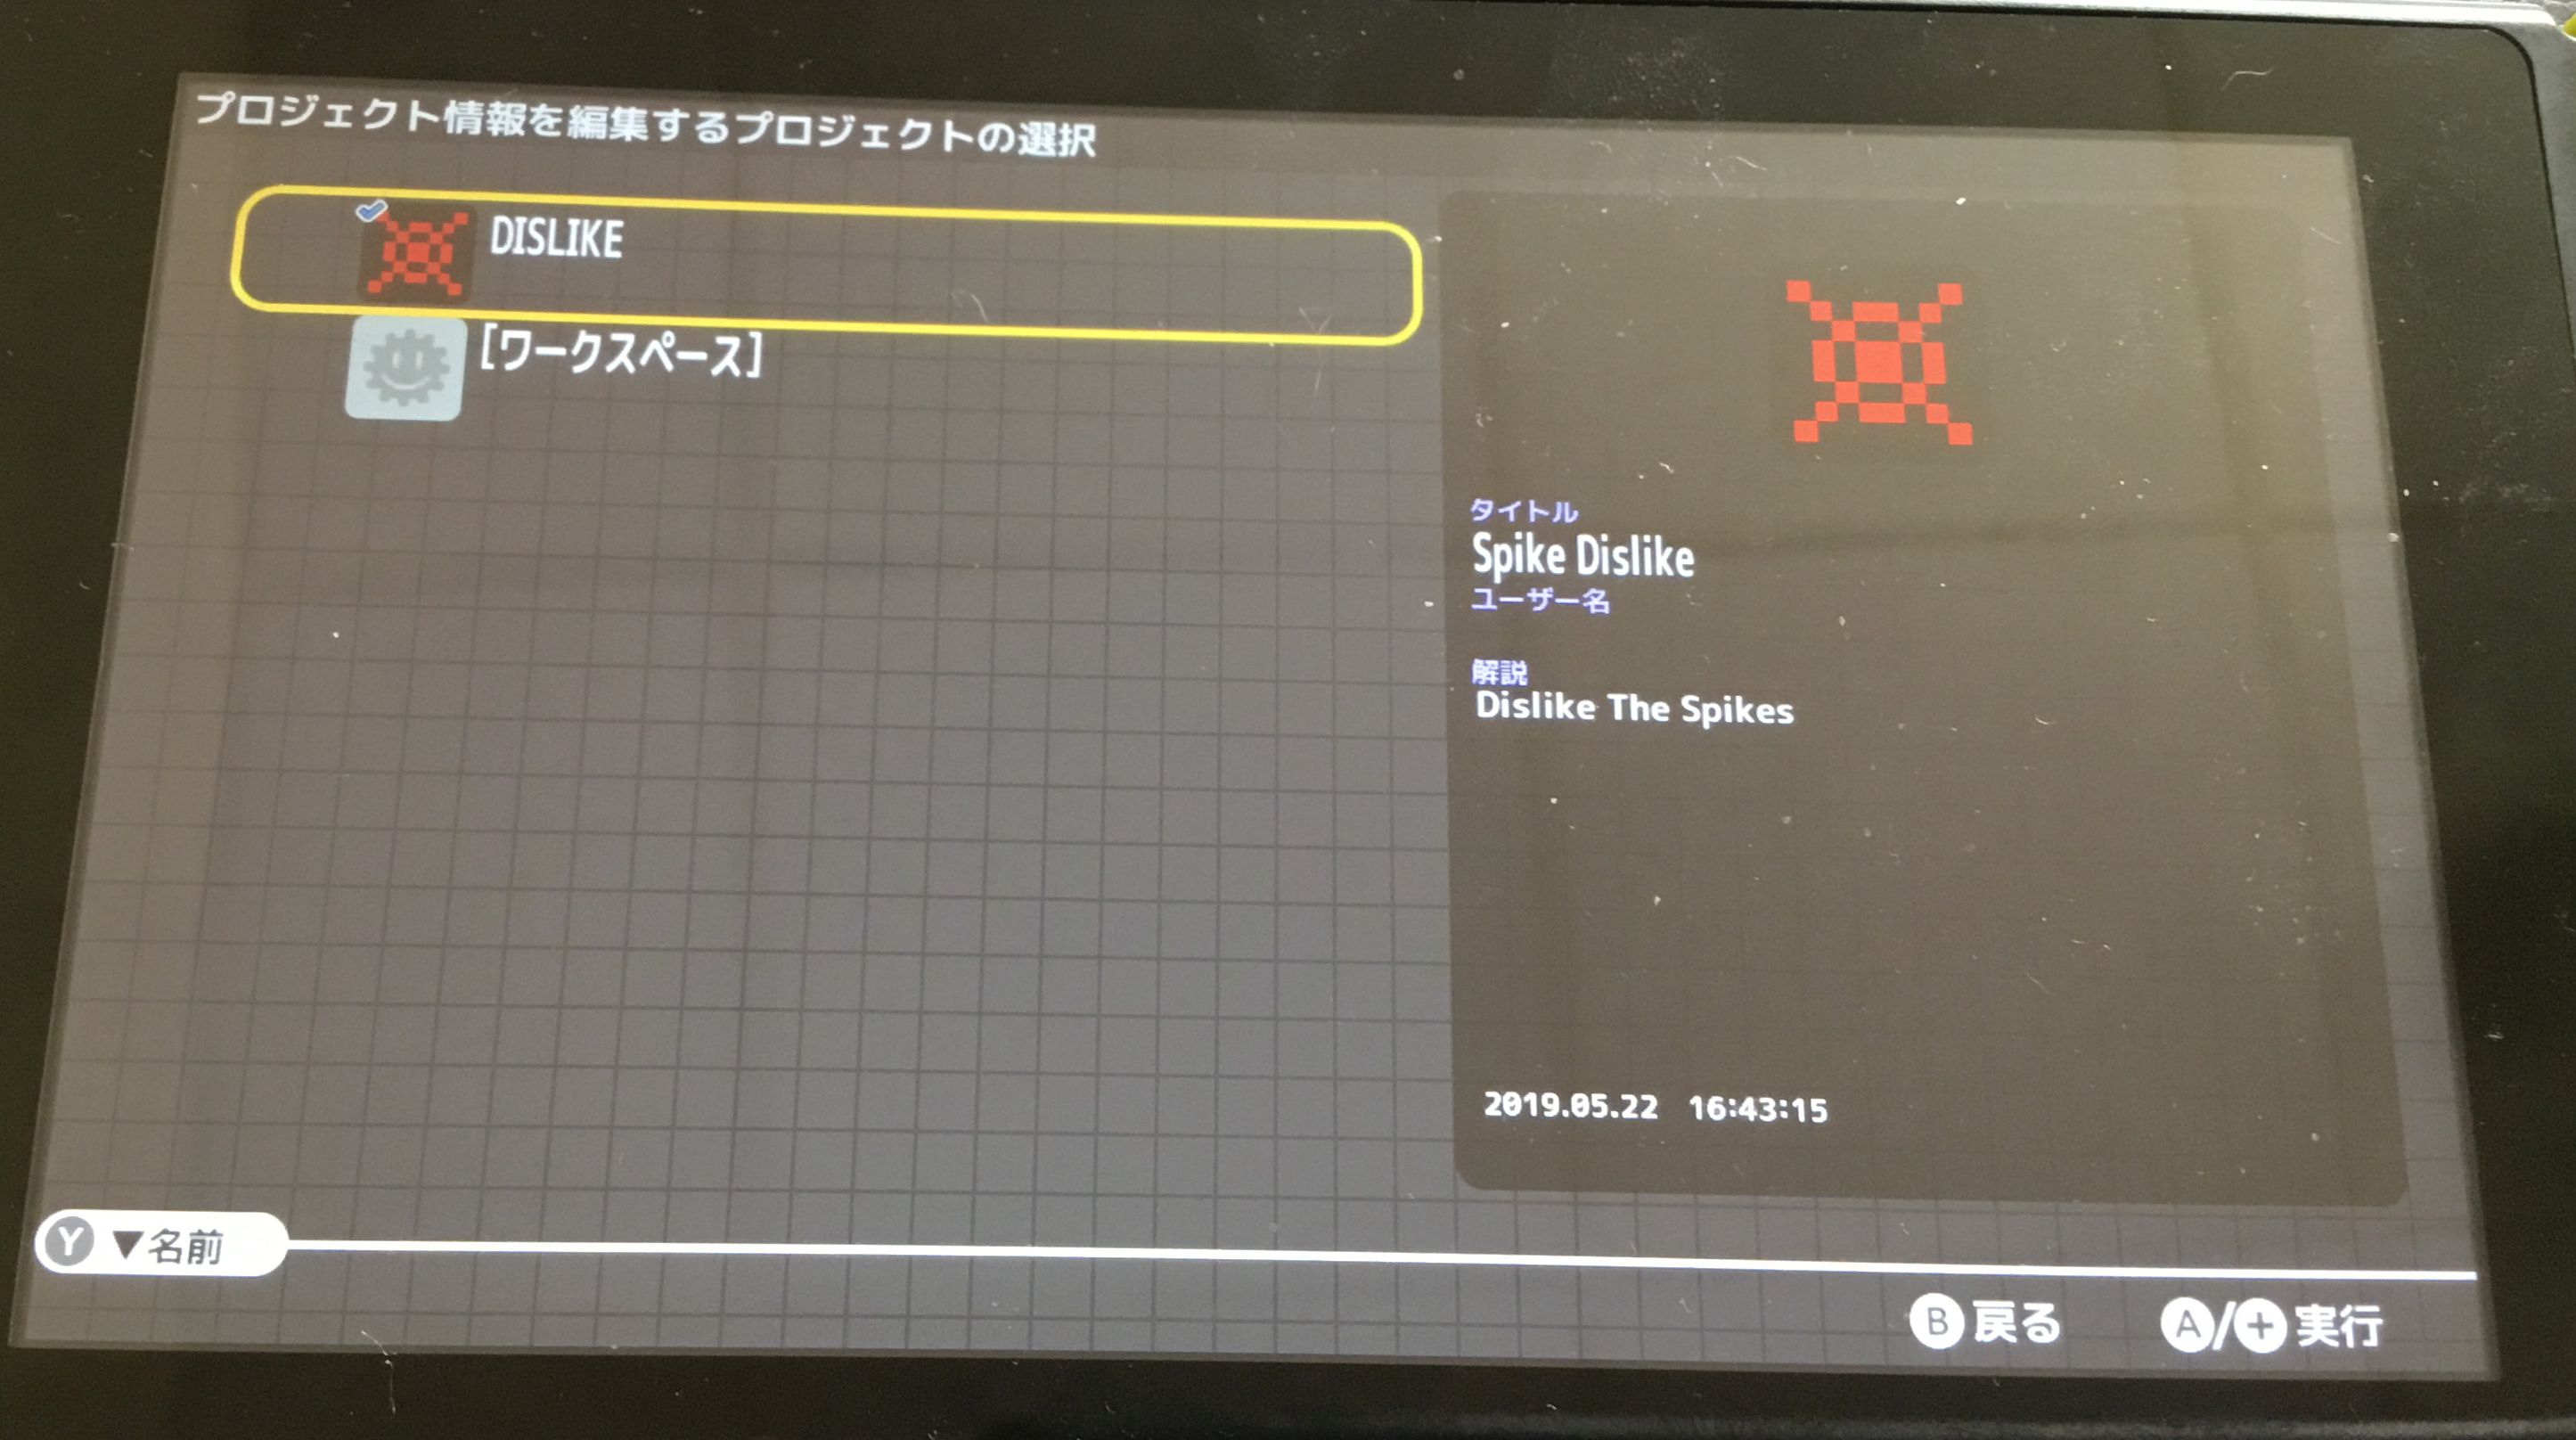 Back in the main menu, the bottom right button launches the code interface. Hit X to flip between "direct" and "code" modes.. (Direct = type commands and they execute immediately, whereas Code is for .. um.. coding!) 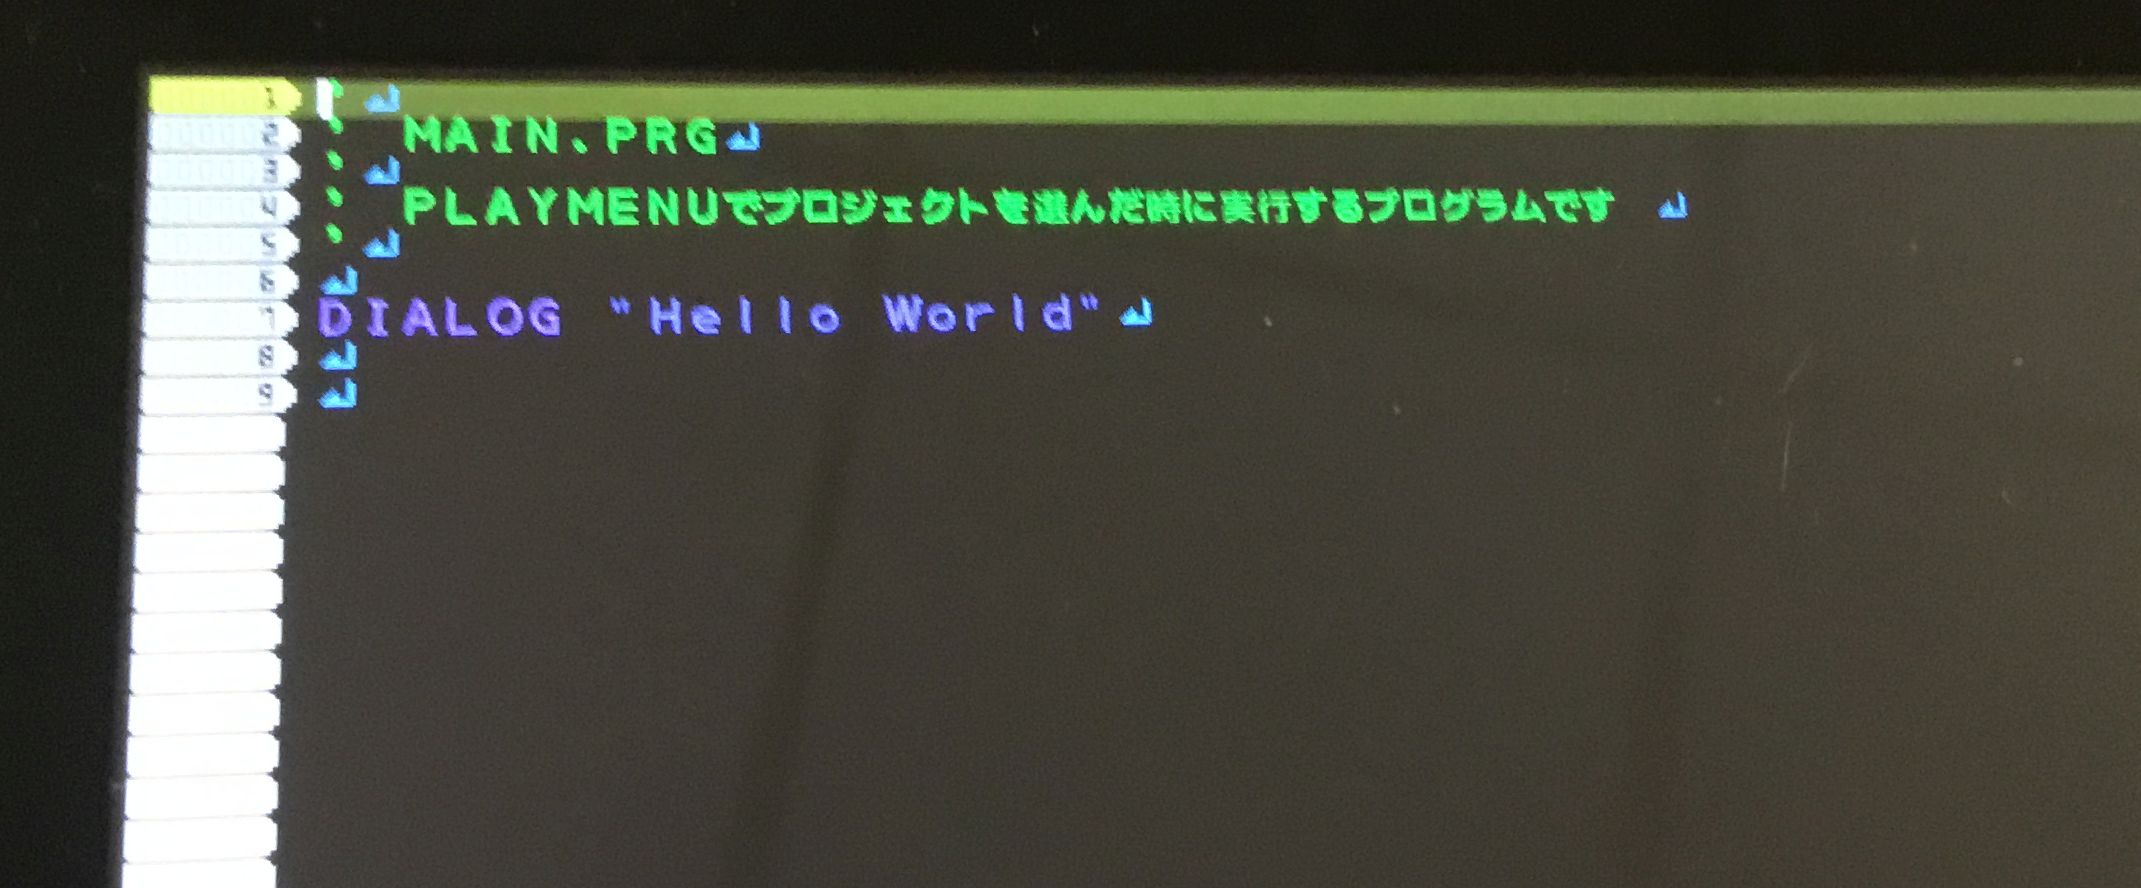 You should see a default Hello World style program, which opens a dialogue, and then not much more. Toggle back to Direct mode and type Save "Main.prg", which will save the program to your new project. Head back out. (Hit The Switch's - button, then the pink Home button on the onscreen keyboard.) On the main menu, we'll head back to the topmost projects button, select our project and hold down A, then choose the topmost "favourites" option, which will add your icon to the program's home screen buttons. 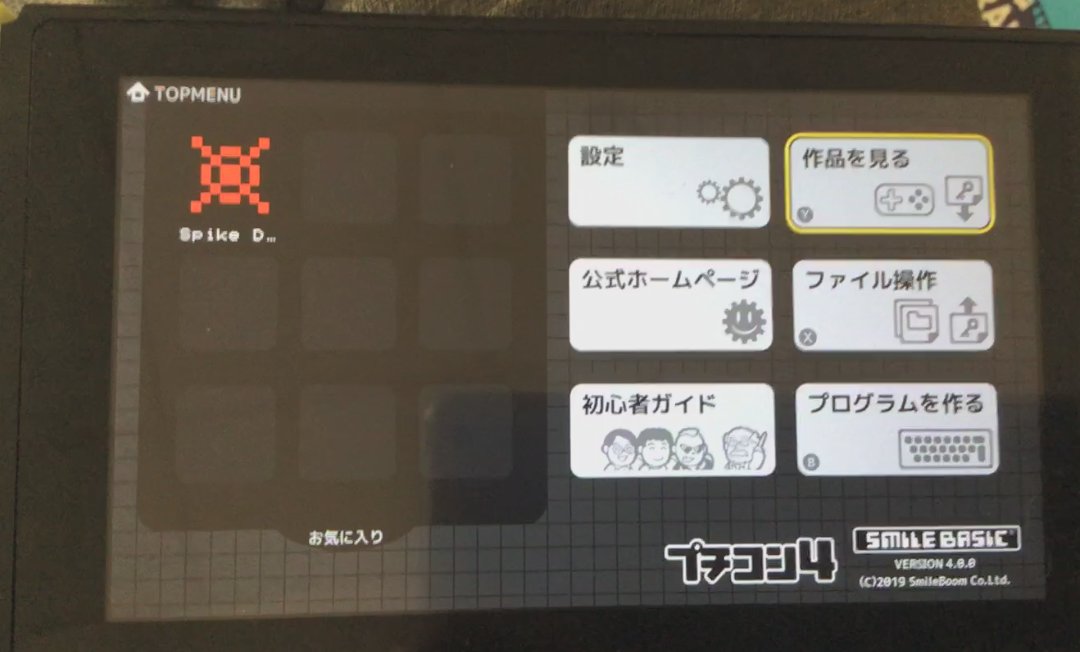 Job done! Now, back to the code side of our project. Shortcut CombosA couple of quick keyboard shortcuts. If you're familiar with most recent languages, those should be fairly familiar. Ctrl-S saves F5 runs your code Ctrl-C breaks execution F1 is help. Hitting this whilst the cursor is over a command will bring up the quick help for that command, and can include examples, or much needed information. F7 switches to Edit mode whilst F8 switches to Direct mode, whilst F4 will toggle between the two. F3 is find, useful in Edit mode. F2 will zoom in on the editor, which is handy when you're looking at the switch in handheld mode, and it's behind the keyboard! F9 brings up a list of sounds, music and other audio things. This will come in handy later! F10 brings up the sprite editor! Also handy!! ... that oughta be enough for now. ButtonsThe Button() function seems to do an awful lot! Type the command and F1 it, to bring up a chart of all the different buttons that it can analyse, as well as the option to either detect "Is held" or "Is pressed".. An important distinction! For now, I'm using #B_RRIGHT for the A button and #B_RLEFT for the Y button. A to start, and move the ball. Y to quit back to the menu. The button code can also detect all kinds of buttons, but not the thumbsticks, so I'll need to look into that, later. ArraysIn this language, we need to define our arrays using DIM VariableName[LengthOfArray], then dumping values in and out using simple functionality. Remember to use square brackets to work with arrays. The arrays are zero based, but I think they also include the top-value, but don't quote me on that!! SpritesHitting F10 brings up the sprite editor. I'm currently unsure how to create a clean image, so we'll first use the scrubber to scrub out a bunch of stuff, then draw some spikes and ball, and lastly save the file. This didn't go well for me, as I appear to only be able to "plot" a 4x4 square, and that takes AGES since the spritesheet is bloomin' huge! I'm left with tons of "mess" in my spritesheet.. Don't forget to save, often..! Also, the interface is a little glitchy, so you might end up drawing "through" the GUI, where your mouse pointer's slightly missed the button.. I've done this a number of times. Once saved, you can load the spritesheet in your code using Load "filename",4 4 seems to load into the Sprite buffer. 0 loads to the background, so I'll have to use that for stars and floor, later. I'm not sure if you can change these layers. I'm sure you can, but.. *shrugs* Set a sprite's sprite number with SPSET n,ImageNum. You NEED to set a sprite number BEFORE moving the sprite, otherwise the code will crash with an "unknown sprite" error. There are more complex SPSET functions for exact co-ordinates, but by default it seems to be assuming each sprite is a 32x32 pixel chunk of data from the Spritesheet, running horizontally. SPOFS n,x,y will move the sprite to the specified location. As mentioned above, be sure you've created the sprite with SPSET first. With all of these elements in play, you should hopefully find that you can now run a nice loop, navigate between Game and Not-Game/Menu, as well as move various sprites around on the screen. Twitter Video Now I need to stop, as the Switch (It's undocked, in handheld mode) is whinging that the battery needs charging. Boooo!! In my next session, I'll see about getting the background layers working, then add some simple collision, before tackling the scoring. With any luck, I should be ready to upload the game to the Petit Switch online server, some time tomorrow. If you'd like to download my various PetitSwitch games, head to this page for the codes Views 1300, Upvotes 63
Petit Computer
,
Smilebasic
,
Nintendo
,
Switch
,
Petit Switch
,
Petitcom4
New games every week!
|


